User interface overview
When you launch XPFlightPlanner, you will be greeted with the main window displaying an empty flight plan document as in the screenshot below:
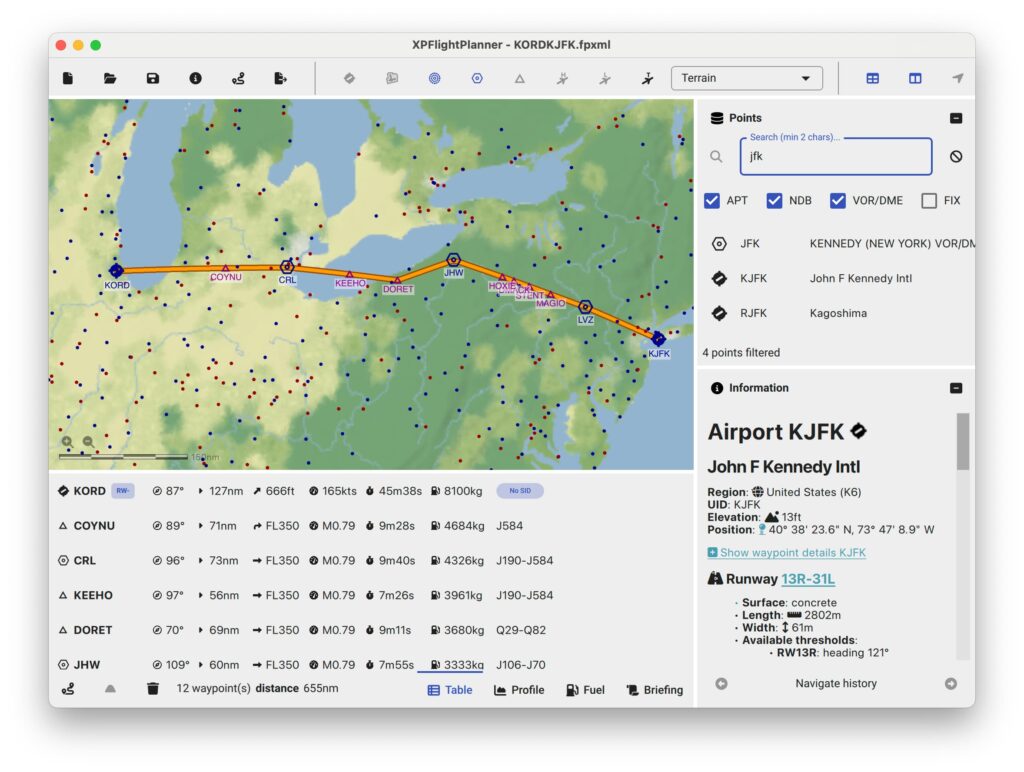
This window is divided into four key sections, each serving a specific purpose:
- The map section provides aeronautical charts and a visual representation of your flight plan, allowing you to navigate and make adjustments as needed.
- The flight plan table (at the bottom) presents a clear overview of all the waypoints and routes in your plan, it also contains the flight plan profile, the fuel information and the text briefing.
- The point panel (right up) of available points corresponds to the comprehensive navigation database, offering a wide range of options for your flight planning needs.
- Finally, the information panel (right down) provides in-depth information and insights about the selected items, be it a specific point or an entire route.
Main toolbar
The versatile upper toolbar in XPFlightPlanner empowers you with various actions to enhance your flight planning experience. This toolbar, is divided in to three sections:
- Seamlessly interact with the flight plan document
- Effortlessly manipulate the map to view different areas
- And conveniently toggle the visibility of the side panel and flight plan table

These intuitive controls provide you with the flexibility and customization options you need to optimize your workflow and make the most out of your flight planning sessions. As you hover your mouse over each button, a helpful tooltip will appear, providing additional guidance and information.
Hotkeys
Hotkeys are efficient tools in XPFlightPlanner that enable you to streamline your interactions and create flight plans. By utilizing these hotkeys, you can significantly speed-up your workflow. Here is a comprehensive list of all the available hotkeys:
| Hotkey | Action |
| A | Add the active point to the route |
| R | Remove the active point from the route |
| Space | Add or remove active point to/from the route |
| I | Show Informations about the active point in the information panel |
| W | Show details about the active Waypoint in the detail panel |
All these hotkeys are also available as shortcuts (Ctrl-Key on Windows or Cmd-Key on macOS). A list of all shortcuts is available by browsing the menus.
These shortcuts and hotkeys are applicable to the active point within the application. An active point refers to the point that is either selected or currently being hovered over by the mouse cursor. Please note that priority is given to the point that is being hovered over.
By familiarizing yourself with these shortcuts and hotkeys, you can optimize your navigation and editing processes, saving you time and effort during flight plan creation. Take advantage of these powerful tools to enhance your XPFlightPlanner experience and make the most out of its features.
Light or dark mode
XPFlightPlanner offers a seamless user experience that caters to your personal preferences. You have the freedom to select between a light or dark mode for the user interface, allowing you to create a visual atmosphere that suits your style and enhances your workflow.
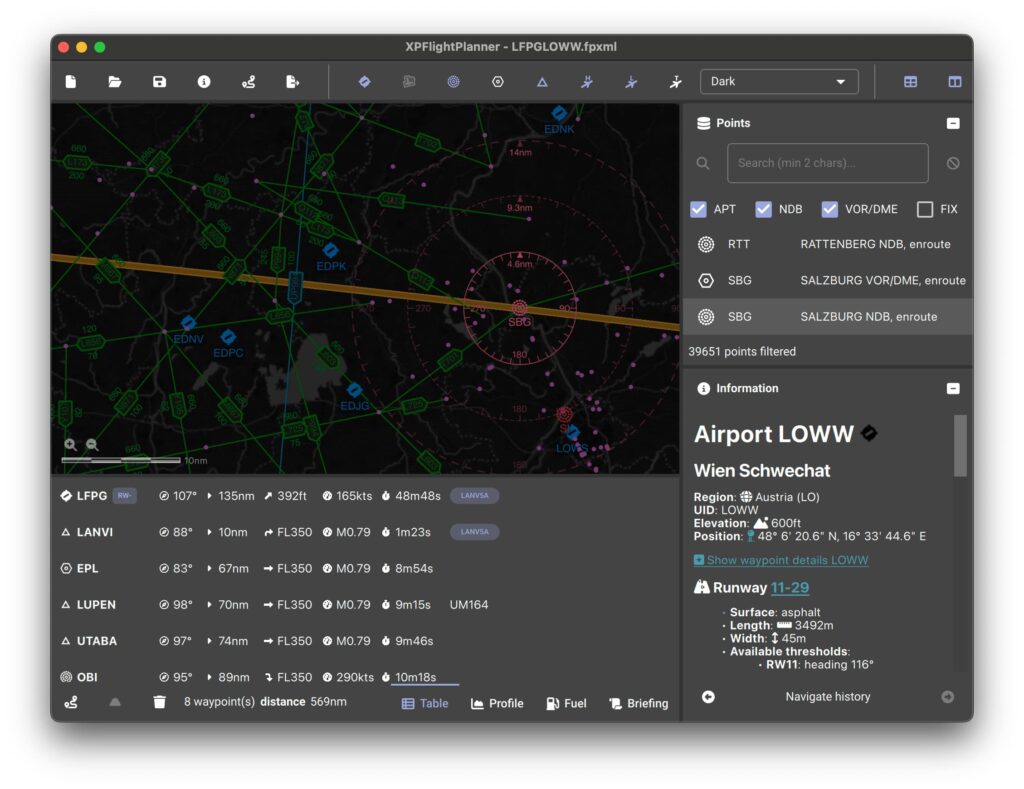
Whether you prefer a clean and bright interface or a sleek and modern look, XPFlightPlanner has you covered. Simply choose a dark map theme (Dark or Midnight) and the user interface automatically switches to dark mode.
Alternatively navigate to the “Preferences” dialog from the “Help” menu to switch between light and dark modes. Enjoy a visually pleasing and customizable experience as you plan your flights with ease.
Inspiration menu
The “Inspiration” menu in XPFlightPlanner is your gateway to endless fly adventures and aviation inspiration. With a variety of pre-defined routes, unique destinations, and exciting aviation challenges, you’ll never run out of ideas for your next flight.
- Explore iconic flights between major international airports
- Or opt for a domestic flight experience
- You can also let XPFlightPlanner surprise you by choosing random airports
The inspiration menu helps you to get ready to fuel your imagination and discover new horizons with the boundless possibilities.
Side panels
The side panels are located on the right side of the main window. They include a point panel and an information panel.
Point panel
The “Point” panel in XPFlightPlanner provides a comprehensive list of all the points available in the navigation database, ranging from FIX, VOR, DME, NDB to airports. It serves as a handy reference for easily accessing and managing these points.
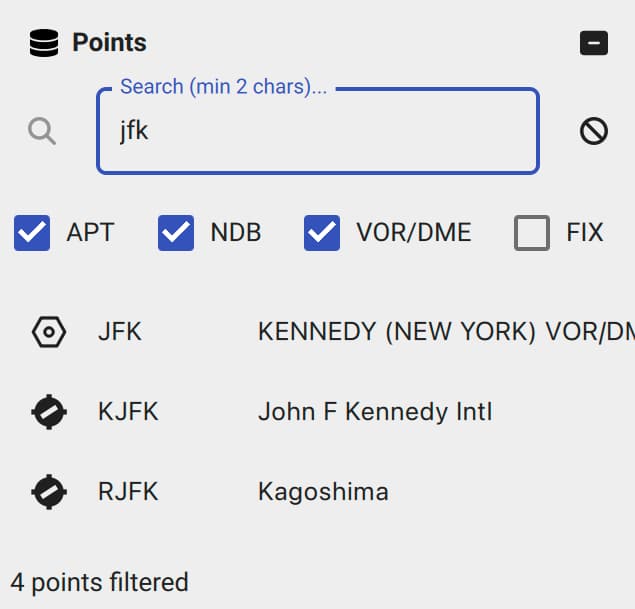
To quickly find a specific point, you can utilize the search field, which allows you to enter the name or code of the desired point. Additionally, the checkboxes in the panel enable you to filter your search results based on specific criteria.
When you click on a point in the panel, it is automatically highlighted and displayed on the map, providing you with a visual reference. For further actions related to a point, you can:
- hit the button or double click on the point to quickly add it to the route,
- or access the contextual menu with relevant options and functionalities by right-clicking.
With the point panel, navigating and interacting with the navigation points in your flight plan has never been easier.
Information panel
The “Information” panel in XPFlightPlanner serves as a convenient tool for obtaining additional information about various items within your flight plan. Whether it’s a navigation point, an airport, a SID/STAR procedure, or a route, the detail panel provides valuable insights.
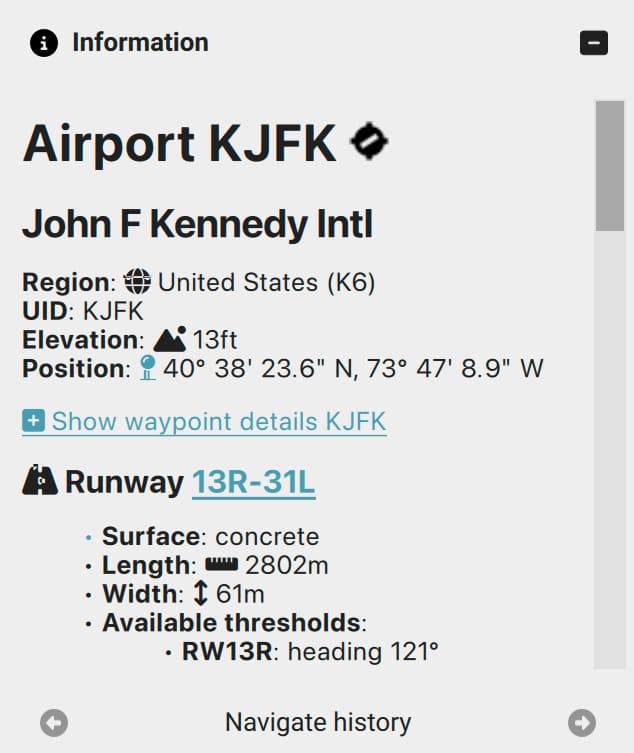
By performing a right-click on an item either on the map or in the point panel, you can easily access the relevant information in the panel. It offers a concise overview of the selected item, allowing you to quickly gather key details.
For a more in-depth exploration, the panel provides clickable links that enable you to navigate to further details and related information. Additionally, the pin links within the panel allow you to conveniently locate and highlight the selected point on the map, enhancing your overall navigation experience.
Navigation map and charts
In XPFlightPlanner, the navigation map becomes your canvas for aeronautical charts exploration and flight planning. Interacting with the map is a breeze with familiar controls:
- Simply click and drag to pan across the map
- Use the scroll wheel on your mouse or pinch on a touchpad to zoom in or out
- Right-click on an item to get access to related actions
- Double-click on an item to add to the flight plan (or remove if already part of it)
- Double-click on the map background to create a custom coordinate point
To further personalize your map experience, you can choose from a variety of themes such as terrain, light, dark, paper, and more. These themes can be easily selected from the dropdown menu in the upper toolbar.

The toolbar offers even more functionality, allowing you to customize the display of various items on the map. With just a click, you can toggle the visibility of airports, airport details, FIX points, VORs, NDBs, jet routes, Victor routes, and even Atlantic or Pacific tracks. This level of control empowers you to focus on the specific elements that are most relevant to your flight planning process.

Please note that for the map to function properly, an Internet connection is required to download and display the map tiles. This ensures that you have access to up-to-date and accurate visual representations of the areas you are exploring.